 Blog Kazawallet
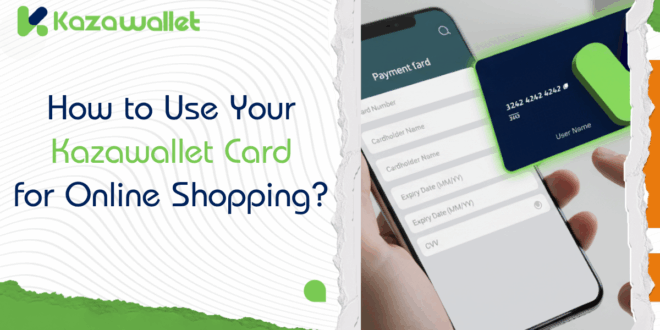
Finally, your Kazawallet Virtual Card is in your hands, and you’re ready to spend online. But when you get to the checkout page on any site, you’ll see certain fields and information that must be entered.
This simple guide will explain exactly what to write in each field when using Kazawallet Virtual Card for payment.
What is the Kazawallet Virtual Card and its features?
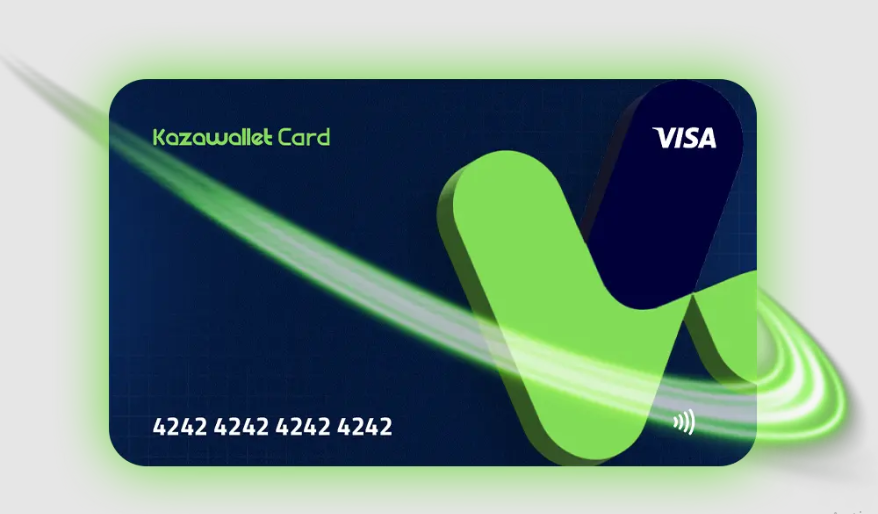
The Kazawallet card is a prepaid virtual Visa card, linked directly to your balance on the platform. It’s designed to give you the purchasing power to spend your assets (whether dollars or digital currencies) anywhere in the world that accepts Visa.
Key features:
- Global Acceptance: Used on millions of websites.
- Google Pay Support: You can link it to Google Pay to use in physical stores.
- Instant Security: You can freeze or cancel it immediately from your account.
- 3D Secure: Protected by an extra security layer via an OTP (One-Time Password) sent to your email.
For more specific details on fees and limits, you can read The Complete Guide to the Kazawallet Virtual Card
What to Write on the Checkout Page? Basic Data and Address
When you get to the checkout page in any store, you’ll find a set of fields asking for information.
We’ll divide these fields into two sections: a section that you copy directly from your card, and another section that requires some explanation.
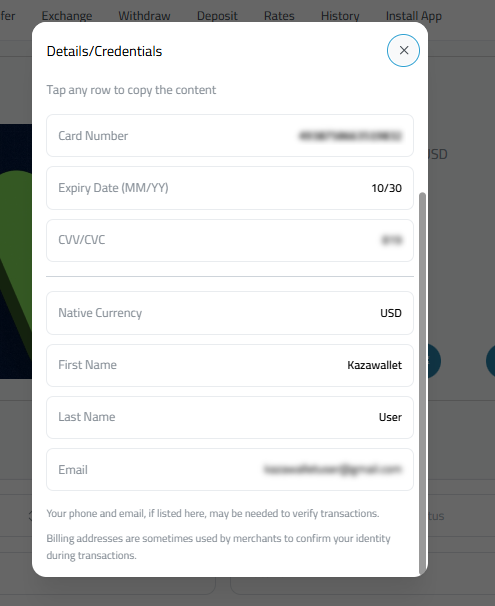
Section 1: Basic Data (From your card details)
All the following information can be copied and pasted directly from the “Show Details” window of your card. For more details, read: How to Show Your Kazawallet Card Details
In this window, you will find everything you need:
- Card Number: The long 16-digit number.
- Expiry Date: The “month/year” date (e.g., 05/30).
- CVV/CVC (Security Code): The 3-digit code.
- Cardholder (Name on Card): The first and last name that is also on your card.
Section 2: Address Details
This is the section that determines the success of the transaction. The way you fill out the address depends on your situation:
Scenario 1: If the site accepts your country
If you are shopping from a site that accepts your country (or you are in a non-blocked country), in this case, you must enter your real home address in the address fields.
Scenario 2: If the site blocks your country
If you are using a VPN to access a site that blocks your country (like Syria), you cannot use your real address. When the site “sees” you are coming from America (via the VPN), it expects you to enter an American address. If you enter your real address, the site will immediately reject the transaction.
How do you get an alternative address?
Here are two secure methods to obtain an address to fill in the payment details:
Method 1: Address Generation Websites
These websites specialize in generating correct and legitimate random addresses in the country of your choice.
- Search on Google for the phrase: Random Address Generator.
- Choose any trusted website that provides you with a complete address (like bestrandoms or browserstack).
- Select the country you want the address from (it must match your VPN location) and choose the number of addresses you want.
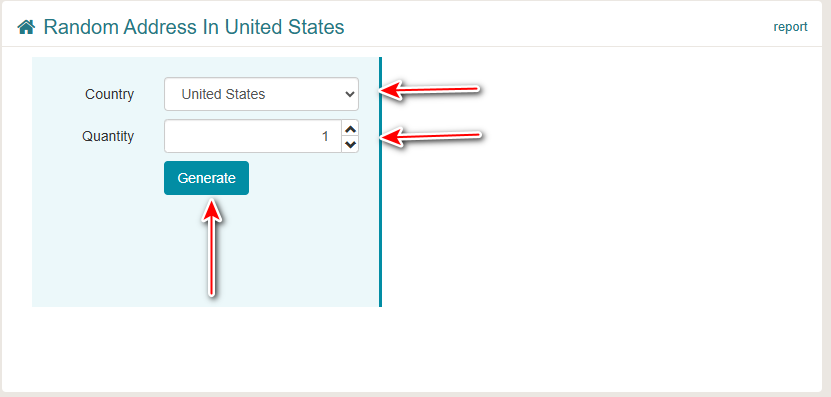
- Copy the details (Street Address, ZIP/Post Code, and State) and use them to fill out the checkout page.

Method 2: Using Google Maps
Let’s assume you’re running a VPN for the “USA”, specifically “New York” city.
- Open the Google Maps app or website in a new window.
- Search for any public, well-known place in New York (e.g., New York Public Library).
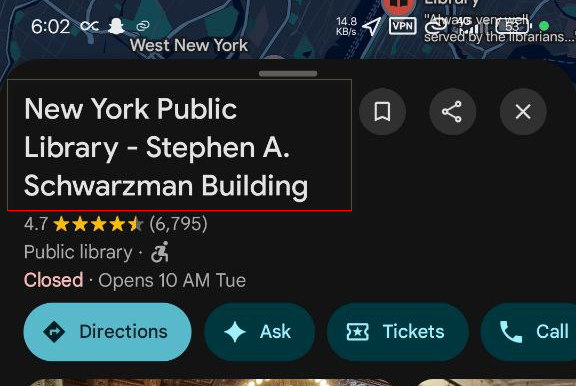
- Click on the location and copy its real address: for example, 476 5th Ave, New York, NY 10018
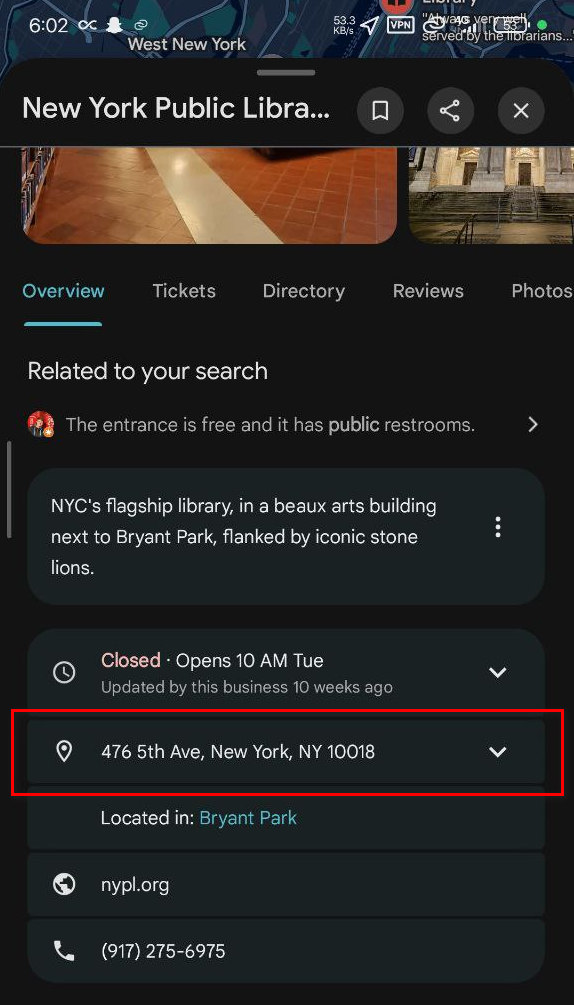
- Now, fill in the payment details on the store’s site as follows:
- Country: United States (because the VPN is American)
- Street Address: (Write the address you copied from Google Maps) 476 5th Ave
- City: New York
- Province / State: (Write the state abbreviation) e.g., NY
- Post Code / ZIP Code: (Write the post code for the same address) (The post code is the number that comes right after the city name, 10018).

- Apt, suite, etc.: This field is always optional. Leave it blank.
This way, the store sees you’ve entered a real, existing address in New York, so it approves the address.
Where can you use your Kazawallet card?
The Kazawallet card is designed to give you the freedom to shop and enjoy entertainment on millions of global websites, such as Amazon, AliExpress, and your favorite games.
However, because we care about the security of your balance and adhere to international financial standards, some entities do not accept payment via virtual cards or may not align with our service policies. It is important to know these categories to avoid any declined transactions:
- Money Transfer Services: The card is dedicated to direct purchases; therefore, it cannot be used to send funds to other individuals or to top up other financial wallets.
- Financial Institutions and Debt: The card does not support loan repayments or direct transactions with banks and currency exchange houses.
- Betting and Illegal Gaming: International regulations prohibit using the card on any websites related to betting or lotteries.
- Private Subscriptions: The card does not work on dating sites or similar services.
- Manual Cash Disbursements: The card is intended for digital online use only and does not allow for manual cash withdrawals from institutions.
- Automated Fuel Dispensers: When traveling, it is recommended not to use the card at fuel stations that require direct automated payment at the pump.
- Legal Payments: The card cannot be used to pay bails or legal bonds to government agencies.
Frequently Asked Questions (FAQ)
1. Can I top up my Kazawallet card from another bank card or PayPal?
No, you cannot top up the card directly from another card or PayPal balance. The card is funded exclusively via “Top-Up” from your main balance already in the Kazawallet platform.
2. Can I link my Kazawallet card to my PayPal account?
Yes, you can link the card to your PayPal account and use it as a payment source when buying through PayPal. However, you cannot use it to receive funds into PayPal.
3. Is the card physical (plastic)? Can it be used at an ATM?
No, the Kazawallet card is virtual only. It is designed for online use and for Google Pay. It does not have a plastic version and cannot be used at ATM machines.
4. Is the card a prepaid type?
Yes, it is a prepaid virtual Visa card.
5. Can anyone use it anywhere?
Yes, the card is accepted globally at millions of stores and websites that accept Visa.
6. If my card is in USD, is there a fee when paying?
No. If the purchase is in US Dollars, no additional fees apply. Foreign Transaction (FX) fees only apply when purchasing in a currency other than US Dollars.
7. How do I make sure a site accepts the card?
The best way is to try it, but you can verify in advance by reviewing Approved Merchant List that has been tested and confirmed to accept the card.
8. What is the card’s security guarantee?
The card is fully secured via the 3D Secure system, which sends an OTP (One-Time Password) to your email for every purchase. You can also freeze or cancel it instantly from your account at any time.
In Conclusion
Now that you know what every field means, from the name on the card to the post code, you have a clear guide on how to use your Kazawallet card for online shopping.
Match your add, use your correct card details and name, and you’ll be ready to go and use your Kazawallet card anywhere.